
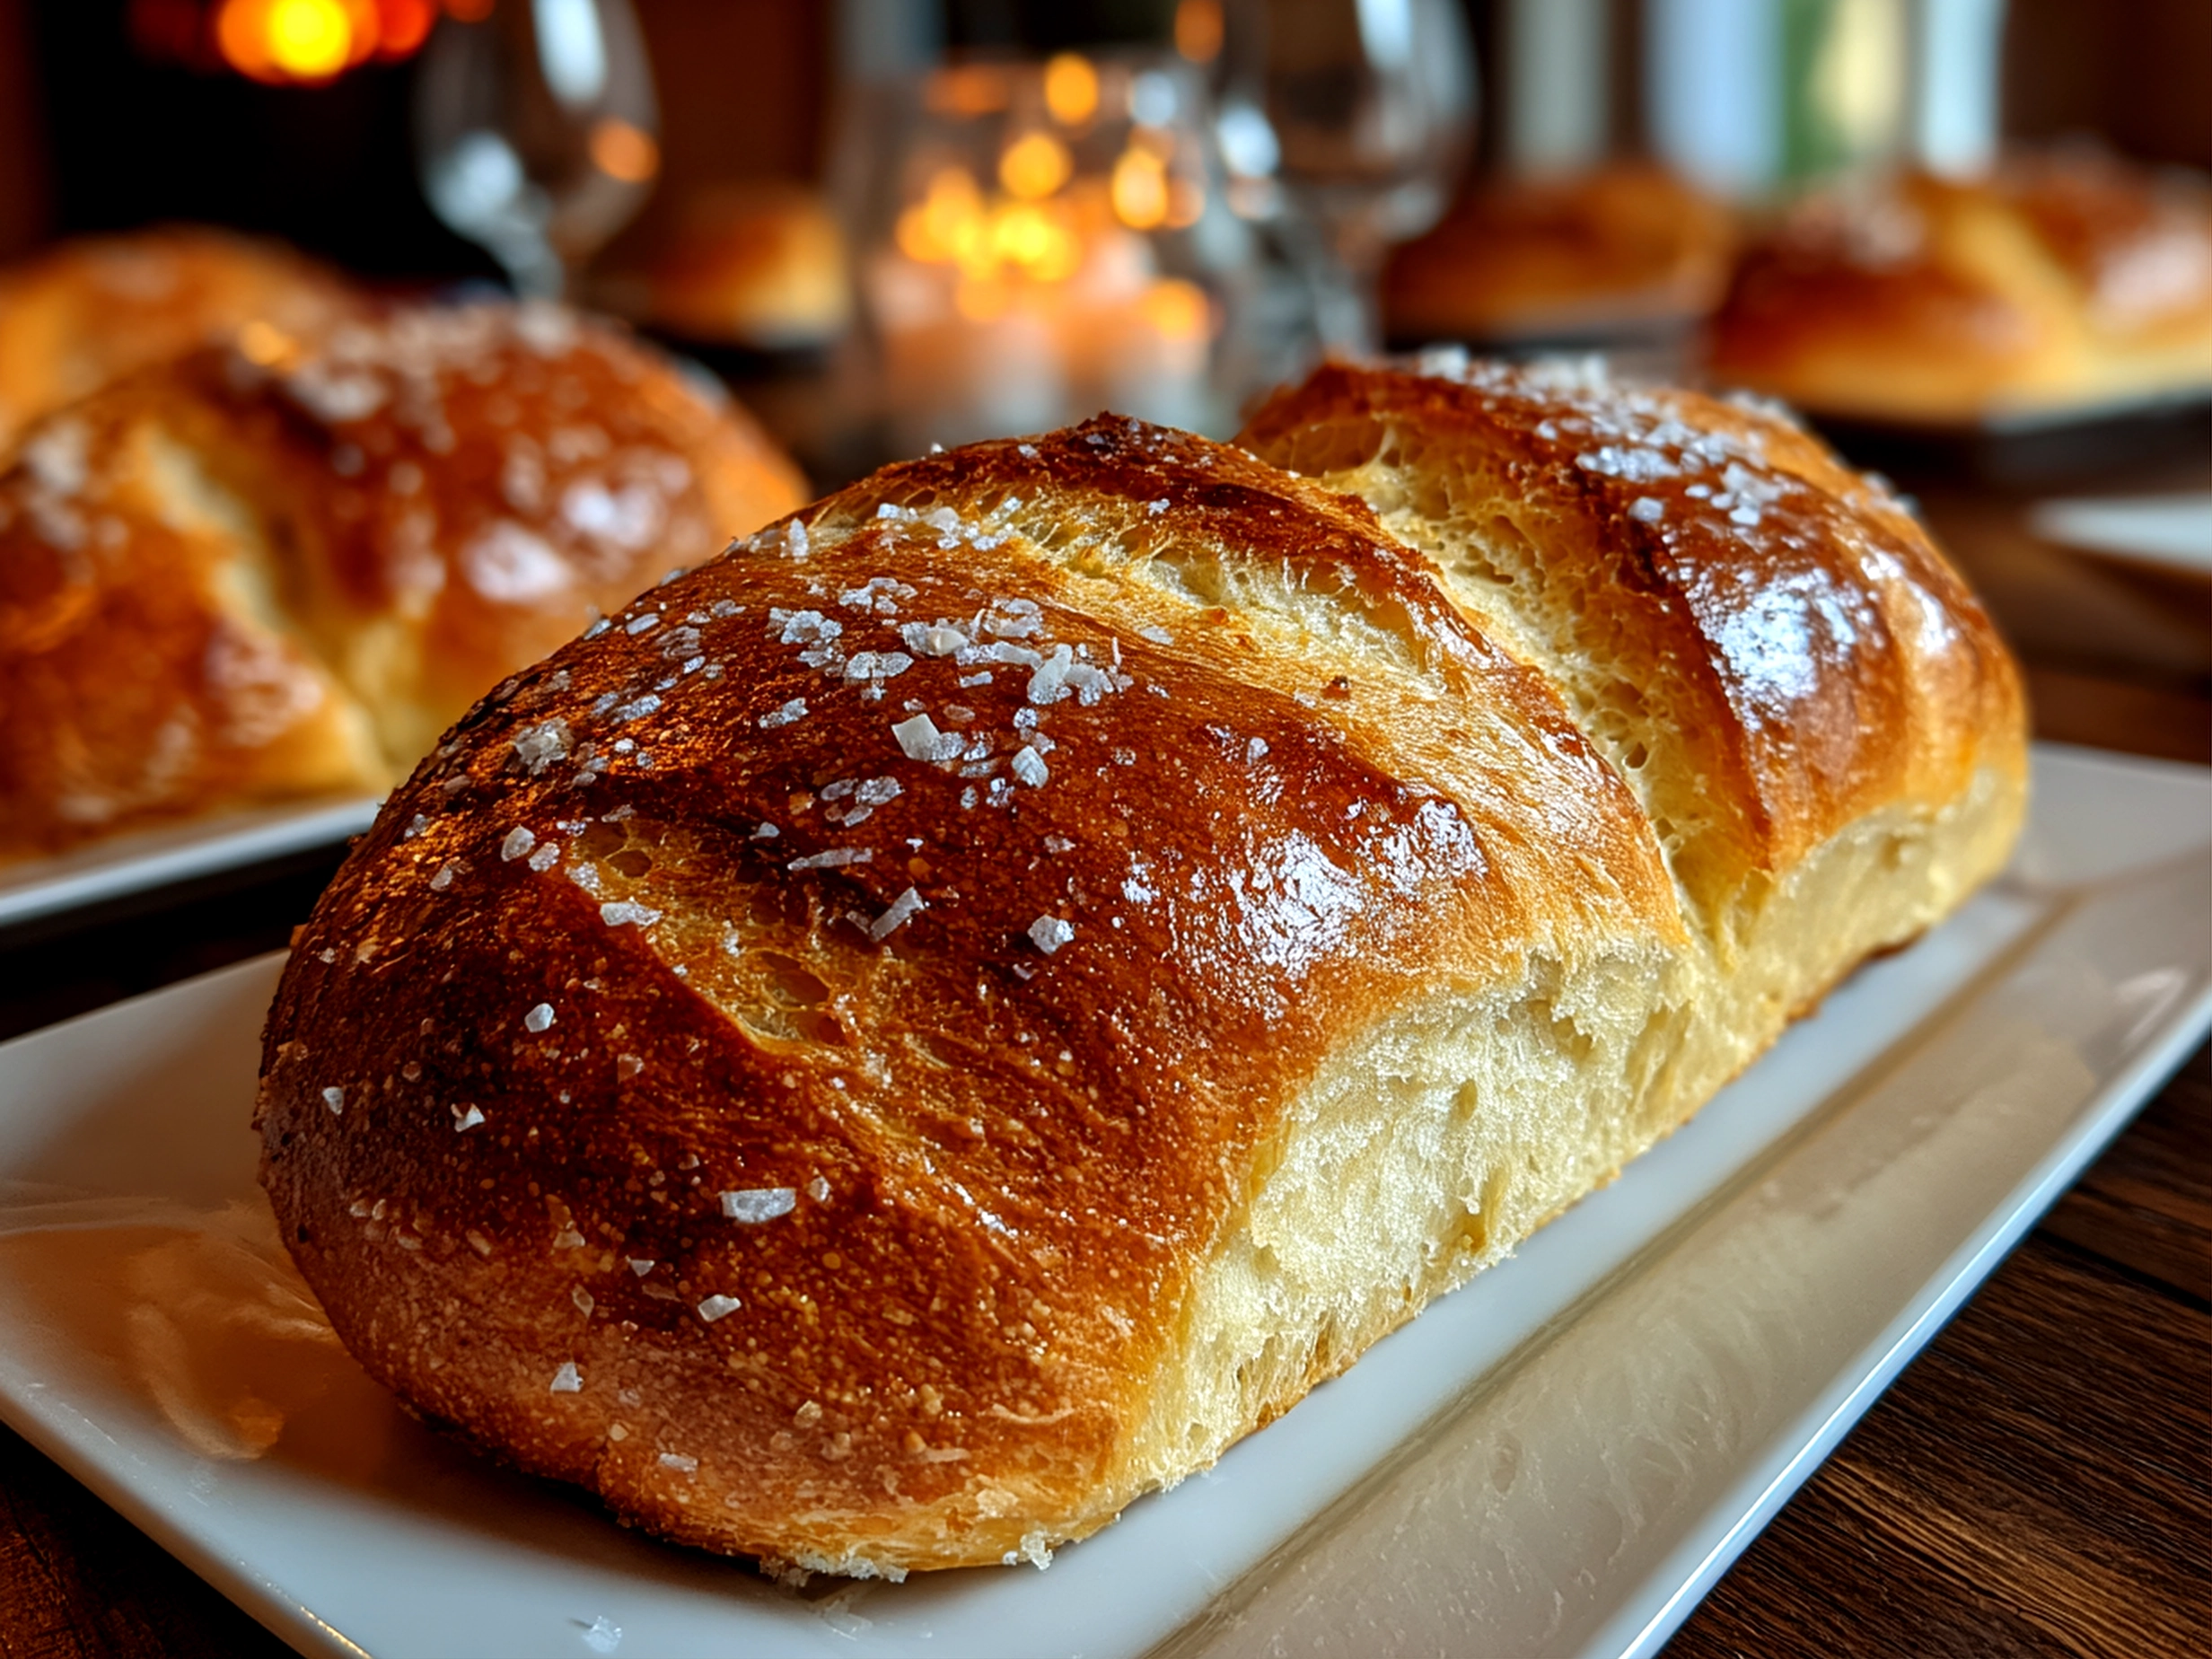
There’s something truly comforting about homemade bread, and this Homemade Italian Bread holds a special place in my heart. I remember the first time I nailed this recipe after a few tries. It wasn’t just about the crispy crust bread or the traditional Italian loaf shape — it was the moment when the smell filled my kitchen, and I knew this would be a recipe I’d bake again and again. Baking this Homemade Italian Bread became part of my routine, offering not just a loaf but a warm, satisfying experience that feels like a simple victory after a busy day.
This Homemade Italian Bread fits perfectly into those weekends when I want to slow down a bit and enjoy the process. It’s forgiving and reliable — exactly what I want from my homemade bread dough recipes. Plus, it’s affordable, uses simple ingredients, and makes the whole kitchen feel like a cozy Italian bakery.
If you’re new to making homemade bread or just looking for a dependable Italian bread recipe, I’m excited to share all my tips and tricks to make sure your Homemade Italian Bread comes out beautifully every time. Baking bread is a little adventure that’s completely worth it, and when you pull that perfect loaf from the oven, there’s nothing quite like it. So, let’s gather what you need and get started on this delicious journey!
If you’re curious, I’ve also enjoyed watching how other wonderful bakers like Ciao Florentina’s rustic crusty bread recipe bring out similar beautiful results—which always inspires me to try new styles in my kitchen.
What You’ll Need for This Homemade Italian Bread:
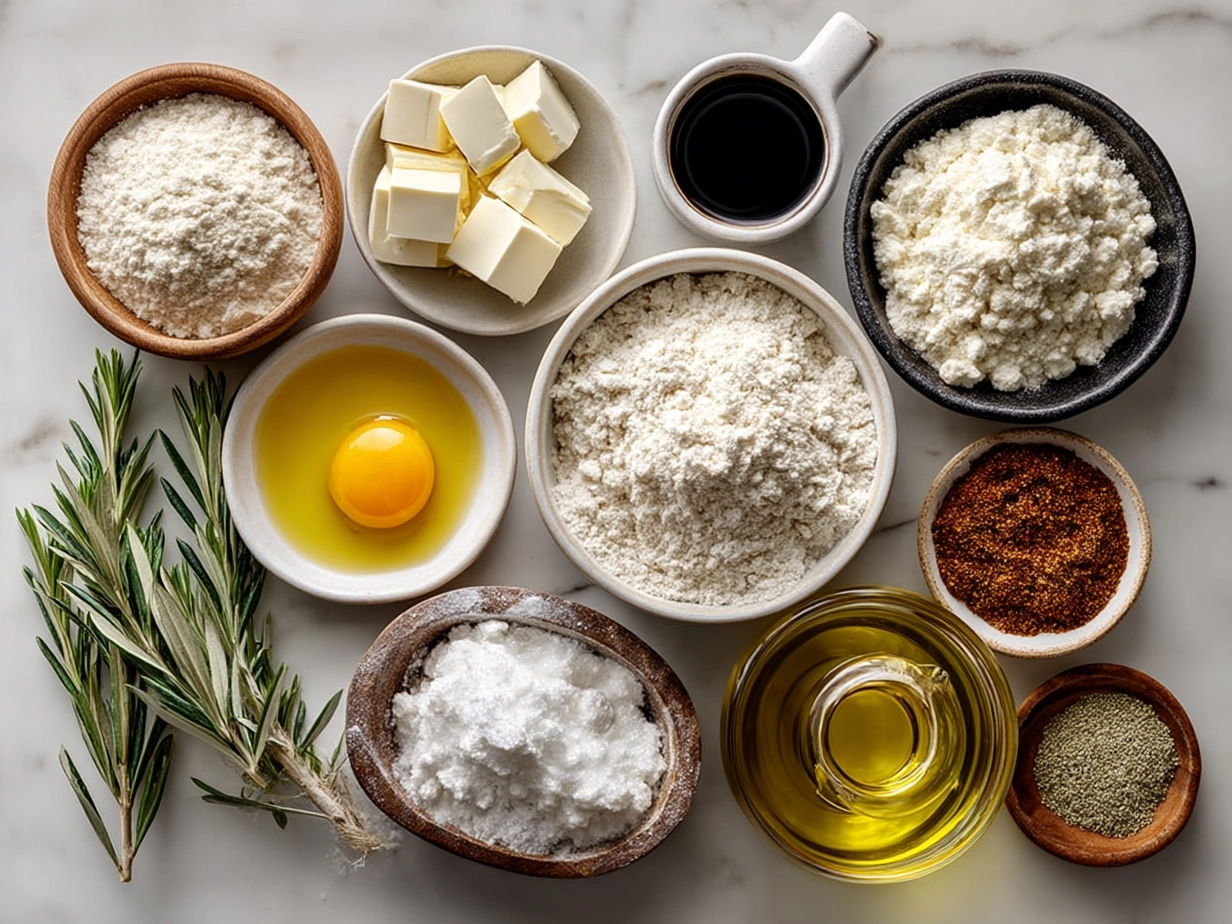
- 3 ½ cups Bread Flour (you can use all-purpose flour in a pinch, but bread flour gives you that perfect chewy texture)
- 1 tablespoon Sugar (this helps the yeast wake up nicely)
- 2 teaspoons Salt (don’t skimp here—it adds flavor and strengthens the dough)
- 1 packet (2 ¼ teaspoons) Active Dry Yeast (you can find this at most stores in the baking aisle)
- 1 ¼ cups Warm Water (around 110°F, not too hot or it kills the yeast)
- 2 tablespoons Olive Oil (for moisture and a bit of rich flavor)
If you don’t have bread flour, all-purpose flour works well for this Homemade Italian Bread too, though the texture might be a little less chewy. I’ve also swapped sugar for honey a few times when I was out, and that gave this bread a lovely subtle sweetness.
Buying ingredients like yeast and flour in bulk can save you money and make this Homemade Italian Bread even more budget-friendly because these staples last a long time in the pantry. Just make sure to store your yeast in the fridge or freezer to keep it fresh longer—this little tip from my own kitchen has saved a ruined loaf more than once!
A quick prep note: you can set your warm water in a microwave-safe bowl and give it a quick zap for 20 seconds to get just the right temperature for waking up your yeast without the fuss. This Homemade Italian Bread recipe is all about making every step easy and enjoyable.
For a little extra flavor, I always add just a teaspoon of garlic powder or dried herbs like oregano to the dough. It’s a small touch that makes this Homemade Italian Bread feel special every time.
If you want to compare, here’s a simple version that caught my eye on Hostess At Heart’s site: 6-Ingredient Homemade Italian Bread Recipe. It’s a great reference for basics.
How to Make This Homemade Italian Bread:
Let’s walk through making your Homemade Italian Bread step-by-step. From start to finish, it takes about three hours including rising time, but most of that is hands-off.
- Activate Your Yeast: In a small bowl, sprinkle your yeast over the warm water with the sugar. Stir gently and let it sit for 5-10 minutes. You’ll see it bubble up or foam—this means your yeast is alive and ready to go.
- Mix Your Dough: In a large bowl, combine your flour and salt. Make a well in the center and pour in the activated yeast mixture and olive oil. Using a wooden spoon or your hand, mix everything until a rough dough forms.
- Knead with Care: Turn the dough out onto a floured surface. Knead by pushing and folding it for about 8-10 minutes. This is the step where a gentle hand makes all the difference with your Homemade Italian Bread. The dough should become smooth and elastic, not sticky.
- First Rise: Lightly oil a bowl and place your dough inside, turning it so all sides get an oil coating. Cover with a clean cloth or plastic wrap and let it rise in a warm place until doubled in size—usually about 1 to 1 ½ hours. This wait is a perfect time to tidy up or enjoy a cup of tea.
- Shape the Loaf: Once risen, punch down the dough gently to release the air. Shape it into a traditional Italian loaf by rolling it into a long oval. Place it on a baking sheet dusted lightly with flour or cornmeal.
- Second Rise: Cover it loosely and let it rest for 30-45 minutes until it’s puffed up again.
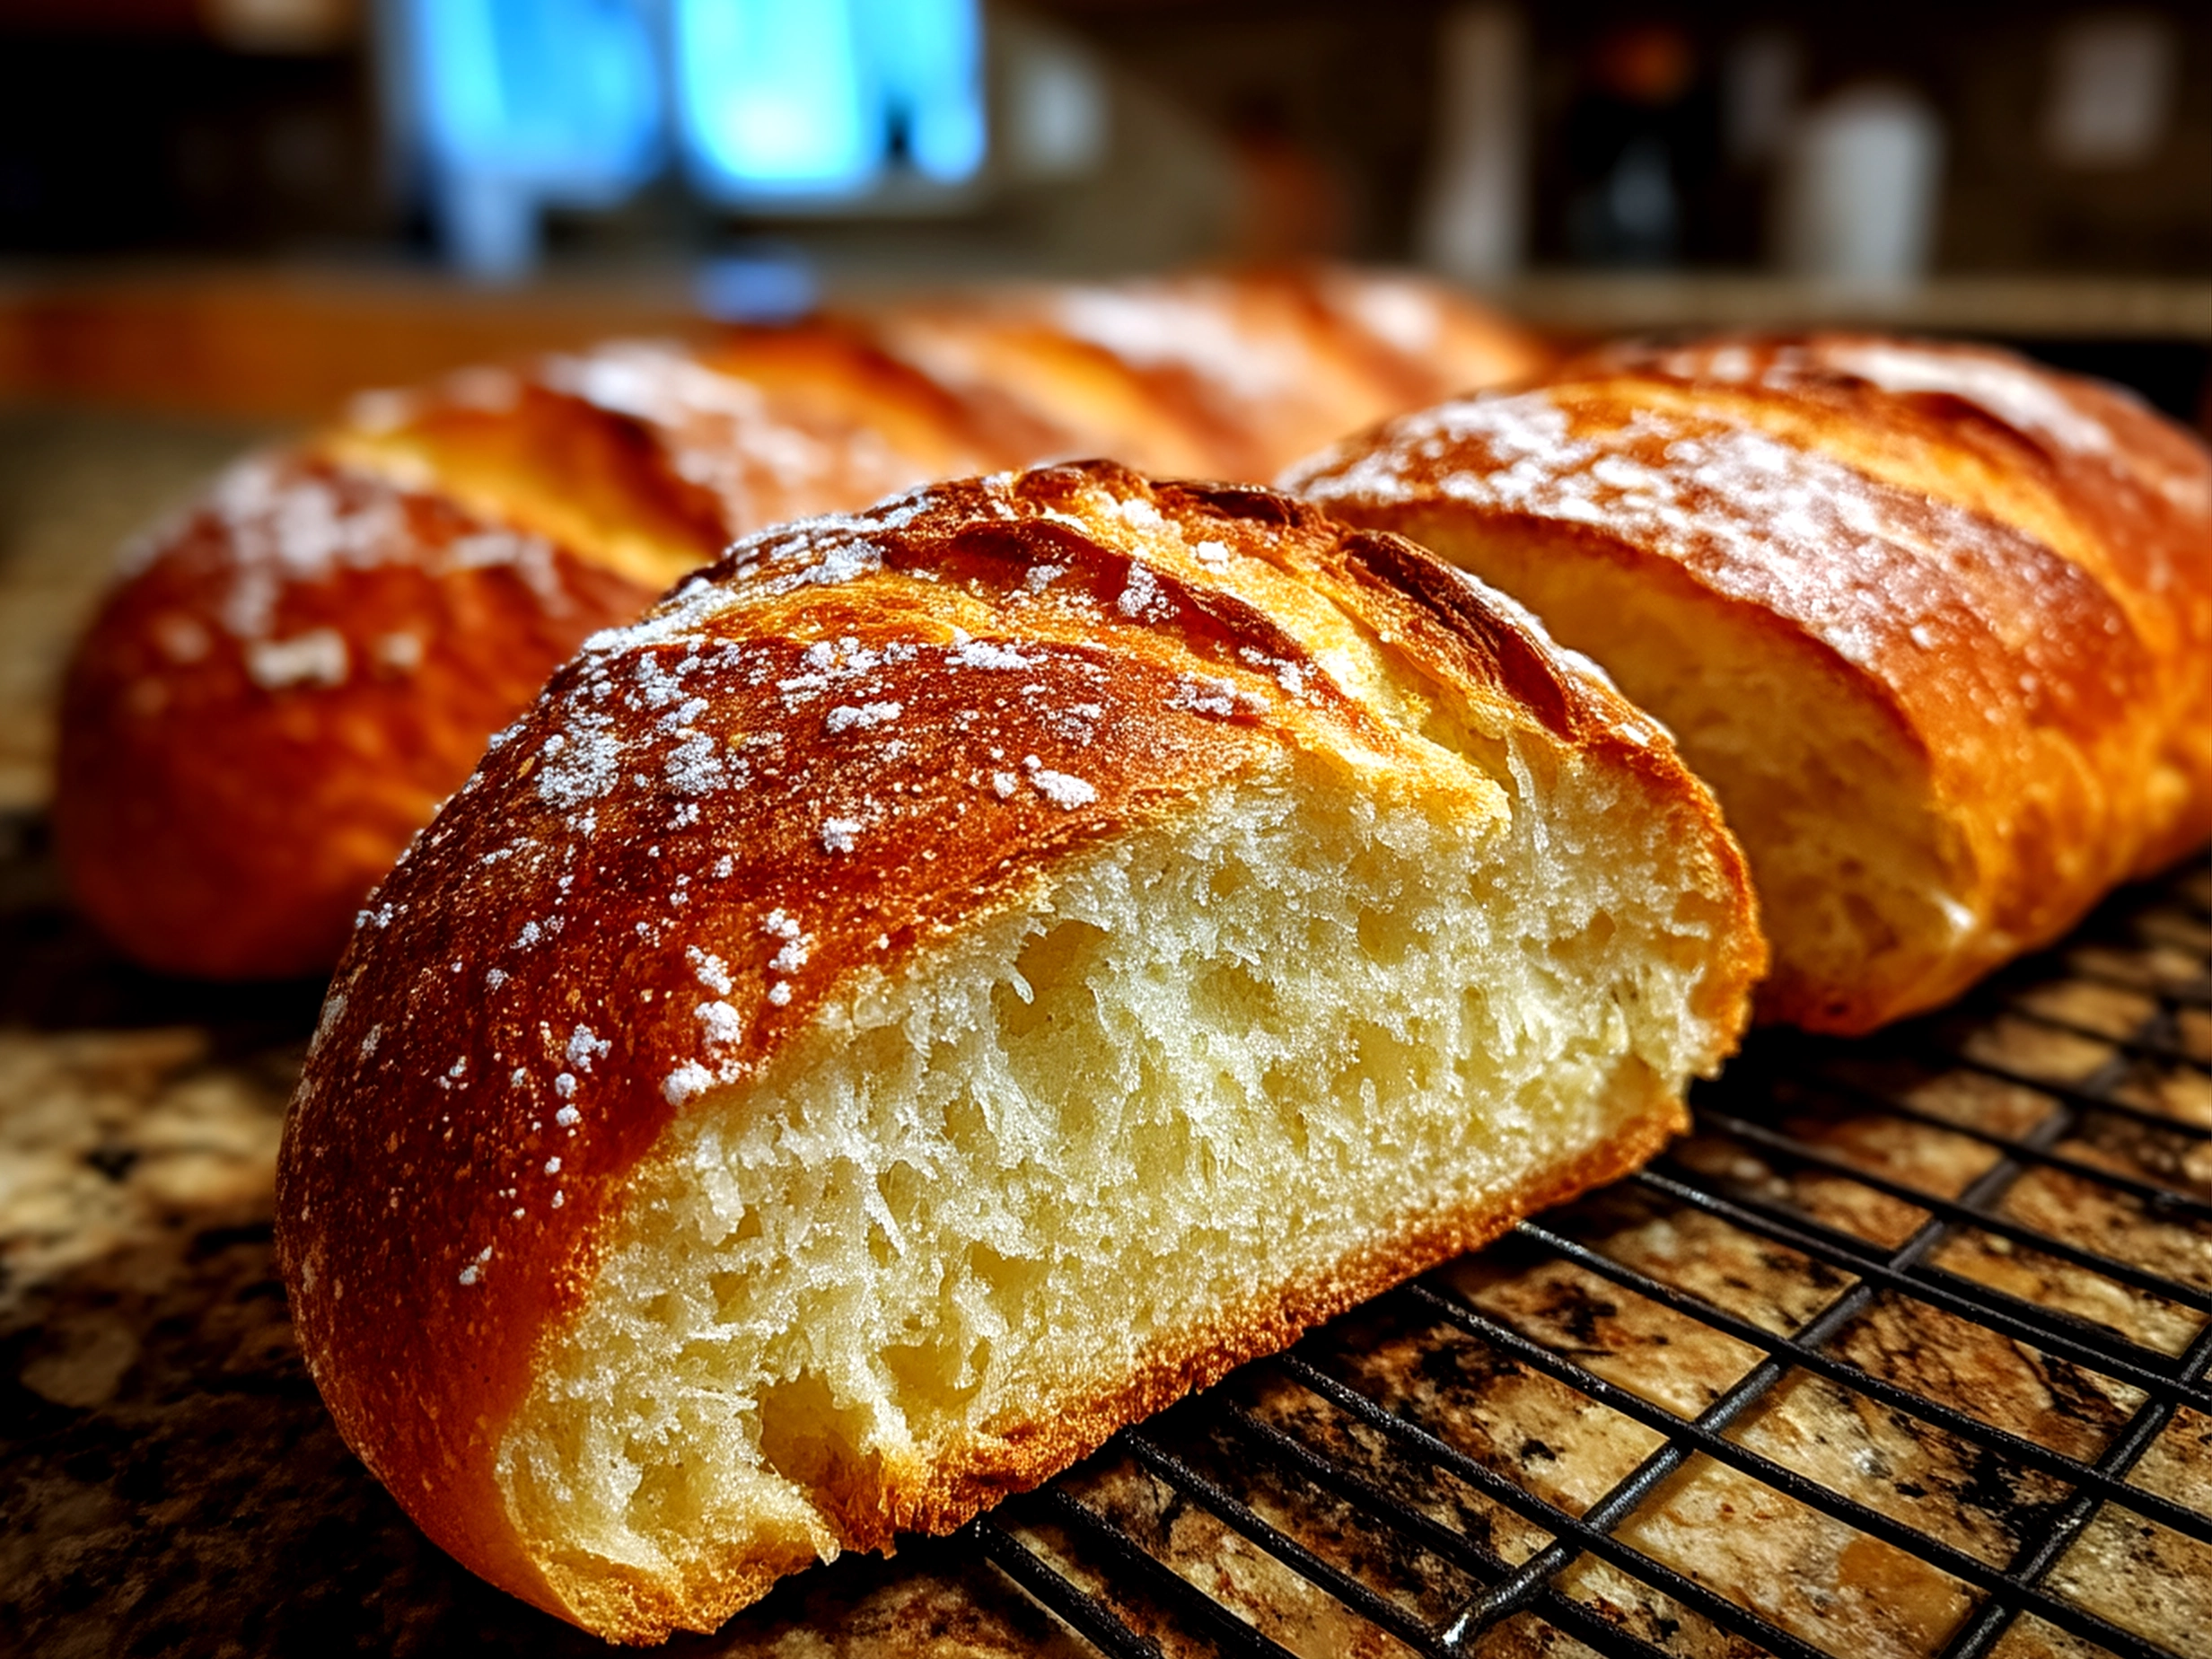
- Prep for Baking: Preheat your oven to 425°F. For that amazing crispy crust bread, place a shallow pan of water on the oven floor to create steam. This little trick helps the crust develop that perfect crunch.
- Bake: Slash the top of the dough several times with a sharp knife or razor blade. Bake your Homemade Italian Bread for 25-30 minutes until golden and the loaf sounds hollow when tapped. Your kitchen will smell heavenly when this Homemade Italian Bread is ready.
- Cool before slicing: It’s tempting, but let your bread cool on a rack to finish cooking inside and keep the crust crunchy.
If your Homemade Italian Bread looks a little flat or dense, it usually means it needed a bit more kneading or rising time. Don’t worry—every loaf teaches you something! For ideas on shaping or crust, Espresso and Lime’s crusty Italian bread has beautiful visuals and tips too.
Serving Your Homemade Italian Bread:
This Homemade Italian Bread feels like a warm hug anytime you eat it. My favorite way to enjoy it is fresh with a drizzle of olive oil and a sprinkle of sea salt. It’s perfect for dipping in soups, especially tomato-based or hearty stews.
It’s also a crowd-pleaser at family dinners and gatherings. I love slicing it thick for sandwiches—slow-cooker Italian beef sandwiches come to mind, and if you want to try that, here’s a recipe I swear by: Slow Cooker Italian Beef Sandwiches.
If you have leftovers (which rarely happens), toasted slices with garlic butter or used as croutons in salads are wonderful options. When autumn rolls in, I sometimes add rosemary or olives right into the dough for a seasonal twist that’s always a hit.
Serving suggestions are simple and delicious, and decorating your loaf with a few scattered sesame seeds before the second rise adds a lovely rustic touch. Friends and family often comment on how this Homemade Italian Bread feels homemade in the best way—wholesome, fresh, and full of heart.
For more inspiration on bread pairing, I found Ciao Florentina’s rustic crusty bread perfect alongside olive oil dips or sharp cheeses.
Common Questions About This Homemade Italian Bread:
Can I make this Homemade Italian Bread ahead of time?
Absolutely! You can prepare the dough, let it rise once, then punch it down and refrigerate it overnight. Just bring it back to room temperature and let it rise again before baking. This method can deepen the flavor, too.
What if I don’t have bread flour?
All-purpose flour works great in this Homemade Italian Bread recipe. The texture will be a little softer, but still delicious and satisfying. Some readers have tried half whole wheat flour for a nuttier loaf — just reduce the water slightly.
How do I get that crispy crust bread?
Steam is your best friend. Adding a pan of hot water to the bottom of the oven while baking helps create steam. Also, avoid covering your bread immediately after baking so the crust stays crisp.
Can I make smaller loaves or rolls with this dough?
Yes! This homemade bread dough is versatile. Just adjust the baking time—smaller rolls bake faster, around 15-20 minutes. It’s a fun way to make little homemade Italian bread snacks.
How long does this bread stay fresh?
Fresh Homemade Italian Bread is best the first day but can be stored in a paper bag or bread box for up to two days. For longer storage, slice and freeze the bread and toast slices as needed.
Can I add herbs or other flavors?
Definitely. Rosemary, oregano, garlic powder, or olives mix in well. I’ve tried sun-dried tomatoes once, and it was a fun twist! Just fold them in during kneading.
Is it difficult to smell when the yeast is off?
Yes, if your yeast doesn’t foam after activation, it’s probably dead or expired. I like to keep mine refrigerated to stay fresh longer. This helps avoid any disappointment when baking this Homemade Italian Bread.
For more tips and ideas from readers who love this recipe, Espresso and Lime’s crusty Italian bread shares practical troubleshooting that’s worth a look.
Final Thoughts on This Homemade Italian Bread:
This Homemade Italian Bread is truly a family favorite that always makes it into my baking rotation. It’s simple enough for weekday baking, yet impressive enough for special meals. Whenever I share it, I get requests for the recipe, especially the version with extra garlic and herbs—definitely my most popular variation!
My Top Tips for This Homemade Italian Bread:
– Always proof your yeast carefully to make sure your dough rises well.
– Don’t rush the rise times; the dough needs patience to develop flavor and texture.
– Use steam in the oven for that irresistible crispy crust bread that everyone loves.
Other favorite variations include adding olives, roasting garlic before mixing, or sprinkling parmesan on top before baking. I hope you’ll make this recipe your own, experimenting and finding the versions that bring you joy.
If you enjoy this Homemade Italian Bread, consider trying it alongside some of my other recipes like Cheddar Jalapeno Cornbread Muffins or as a perfect side for a cozy sandwich like Slow Cooker Italian Beef Sandwiches.
I genuinely hope you’ll love baking this Homemade Italian Bread as much as I do. There’s something so wonderful about making bread your own way and sharing the results with friends and family. You’ve got this!
Happy baking, friends!
Homemade Italian Bread

This homemade Italian bread features a crusty exterior and a soft, airy interior, perfect for sandwiches or dipping in olive oil.
- Prep Time: 15 minutes
- Cook Time: 30 minutes
- Total Time: 1 hour 45 minutes
- Yield: 1 loaf (about 8 servings)
- Category: Dinner
- Method: Baked
- Cuisine: Italian
Ingredients
- 4 cups all-purpose flour
- 1 1/2 cups warm water (110°F)
- 2 teaspoons active dry yeast
- 1 tablespoon sugar
- 2 teaspoons salt
- 2 tablespoons olive oil
Instructions
- In a small bowl, dissolve sugar and yeast in warm water. Let stand until foamy, about 5-10 minutes.
- In a large bowl, combine flour and salt. Make a well in the center and add yeast mixture and olive oil.
- Mix until the dough begins to come together, then knead on a floured surface for 8-10 minutes until smooth and elastic.
- Place dough in a lightly oiled bowl, cover with a damp cloth, and let rise in a warm place for 1 to 1.5 hours or until doubled in size.
- Punch down dough and shape into a loaf. Place on a greased baking sheet or in a loaf pan.
- Cover again and let rise for 30-45 minutes until doubled.
- Preheat oven to 375°F (190°C). Optionally, slash the top of the loaf with a sharp knife.
- Bake for 25-30 minutes, or until the bread is golden brown and sounds hollow when tapped.
- Cool on a wire rack before slicing.
Notes
For extra flavor, brush the top with olive oil and sprinkle with sea salt before baking.